Wood burning, also known as pyrography, is a timeless craft that lets you create art by burning designs into wood surfaces. It combines artistry and technical precision, allowing you to transform ordinary pieces of wood into something extraordinary. From personalized gifts to detailed artwork, wood burning offers endless possibilities for creative expression.
Whether you’re a complete beginner or looking to refine your skills, getting started can be simple with the right guidance. This guide will walk you through the tools you need, techniques to master, and safety tips to ensure a smooth and enjoyable experience. From selecting the right wood to applying finishing touches, everything you need to know is just ahead.
Wood burning, or pyrography, is the art of using heat to create designs on wood surfaces. The process involves a specialized tool, often resembling a pen, that transfers heat to the wood, creating lines, shading, and intricate patterns. This craft has been around for centuries, evolving from basic branding techniques to a refined form of artistic expression.
At its core, wood burning is a controlled process of scorching the wood’s surface. The heated tip of the tool interacts with the wood, darkening it to produce the desired design. Different levels of heat and various tool tips allow for a wide range of effects, from bold outlines to delicate shading. The outcome depends on the technique, pressure, and type of wood used.
Wood burning appeals to people for several reasons:
Unlike painting or carving, wood burning has a distinctive look that is both rustic and elegant. The contrast between the burned lines and the natural grain of the wood adds character and depth to each piece. Plus, every design is permanent, ensuring your artwork stands the test of time.
Whether you’re new to crafting or an experienced artist, wood burning has something for everyone:
Wood burning is more than a hobby—it’s a creative outlet that combines art, craftsmanship, and a touch of nostalgia. With just a bit of practice and patience, you can create unique, lasting pieces that are truly one of a kind.
To get started with wood burning, you’ll need a few basic tools and materials. Here’s a detailed breakdown of what you’ll need and why each item is important:
The most crucial item is a wood burning tool, often called a pyrography pen. These tools come in two main types:
Some kits also include interchangeable tips, which let you experiment with different effects, such as fine lines, shading, and stamping.
Not all wood is created equal when it comes to pyrography. Start with soft, untreated wood for the best results:
Make sure the wood surface is smooth and sanded before you begin.
Sanding the wood is essential for a clean, even burn. Start with a medium grit (around 120) and finish with a fine grit (220 or higher). A smooth surface ensures better control of your tool and a more polished final result.
Sketching your design beforehand helps guide your work. Use a light pencil to outline your design, and make sure to erase any unnecessary marks before you begin burning.
Safety is critical when working with high heat and fumes:
A heat-resistant work surface ensures you don’t damage your table or workspace. Look for silicone mats or metal sheets designed for crafting.
For precise designs, especially geometric patterns or lettering, a ruler helps create clean, straight lines.
Ash and debris can build up on your tool tips during use. A brass wire brush or soft cloth will keep your tips clean and functioning effectively.
Optional Tools:
With these tools, you’ll have everything you need to begin your wood burning journey. Start simple, focus on mastering your tools, and you’ll be creating stunning designs in no time.
The type of wood you choose plays a significant role in your wood burning project. Different woods produce different effects, and some are easier to work with than others. Here’s a detailed guide to help you pick the best wood for your needs:
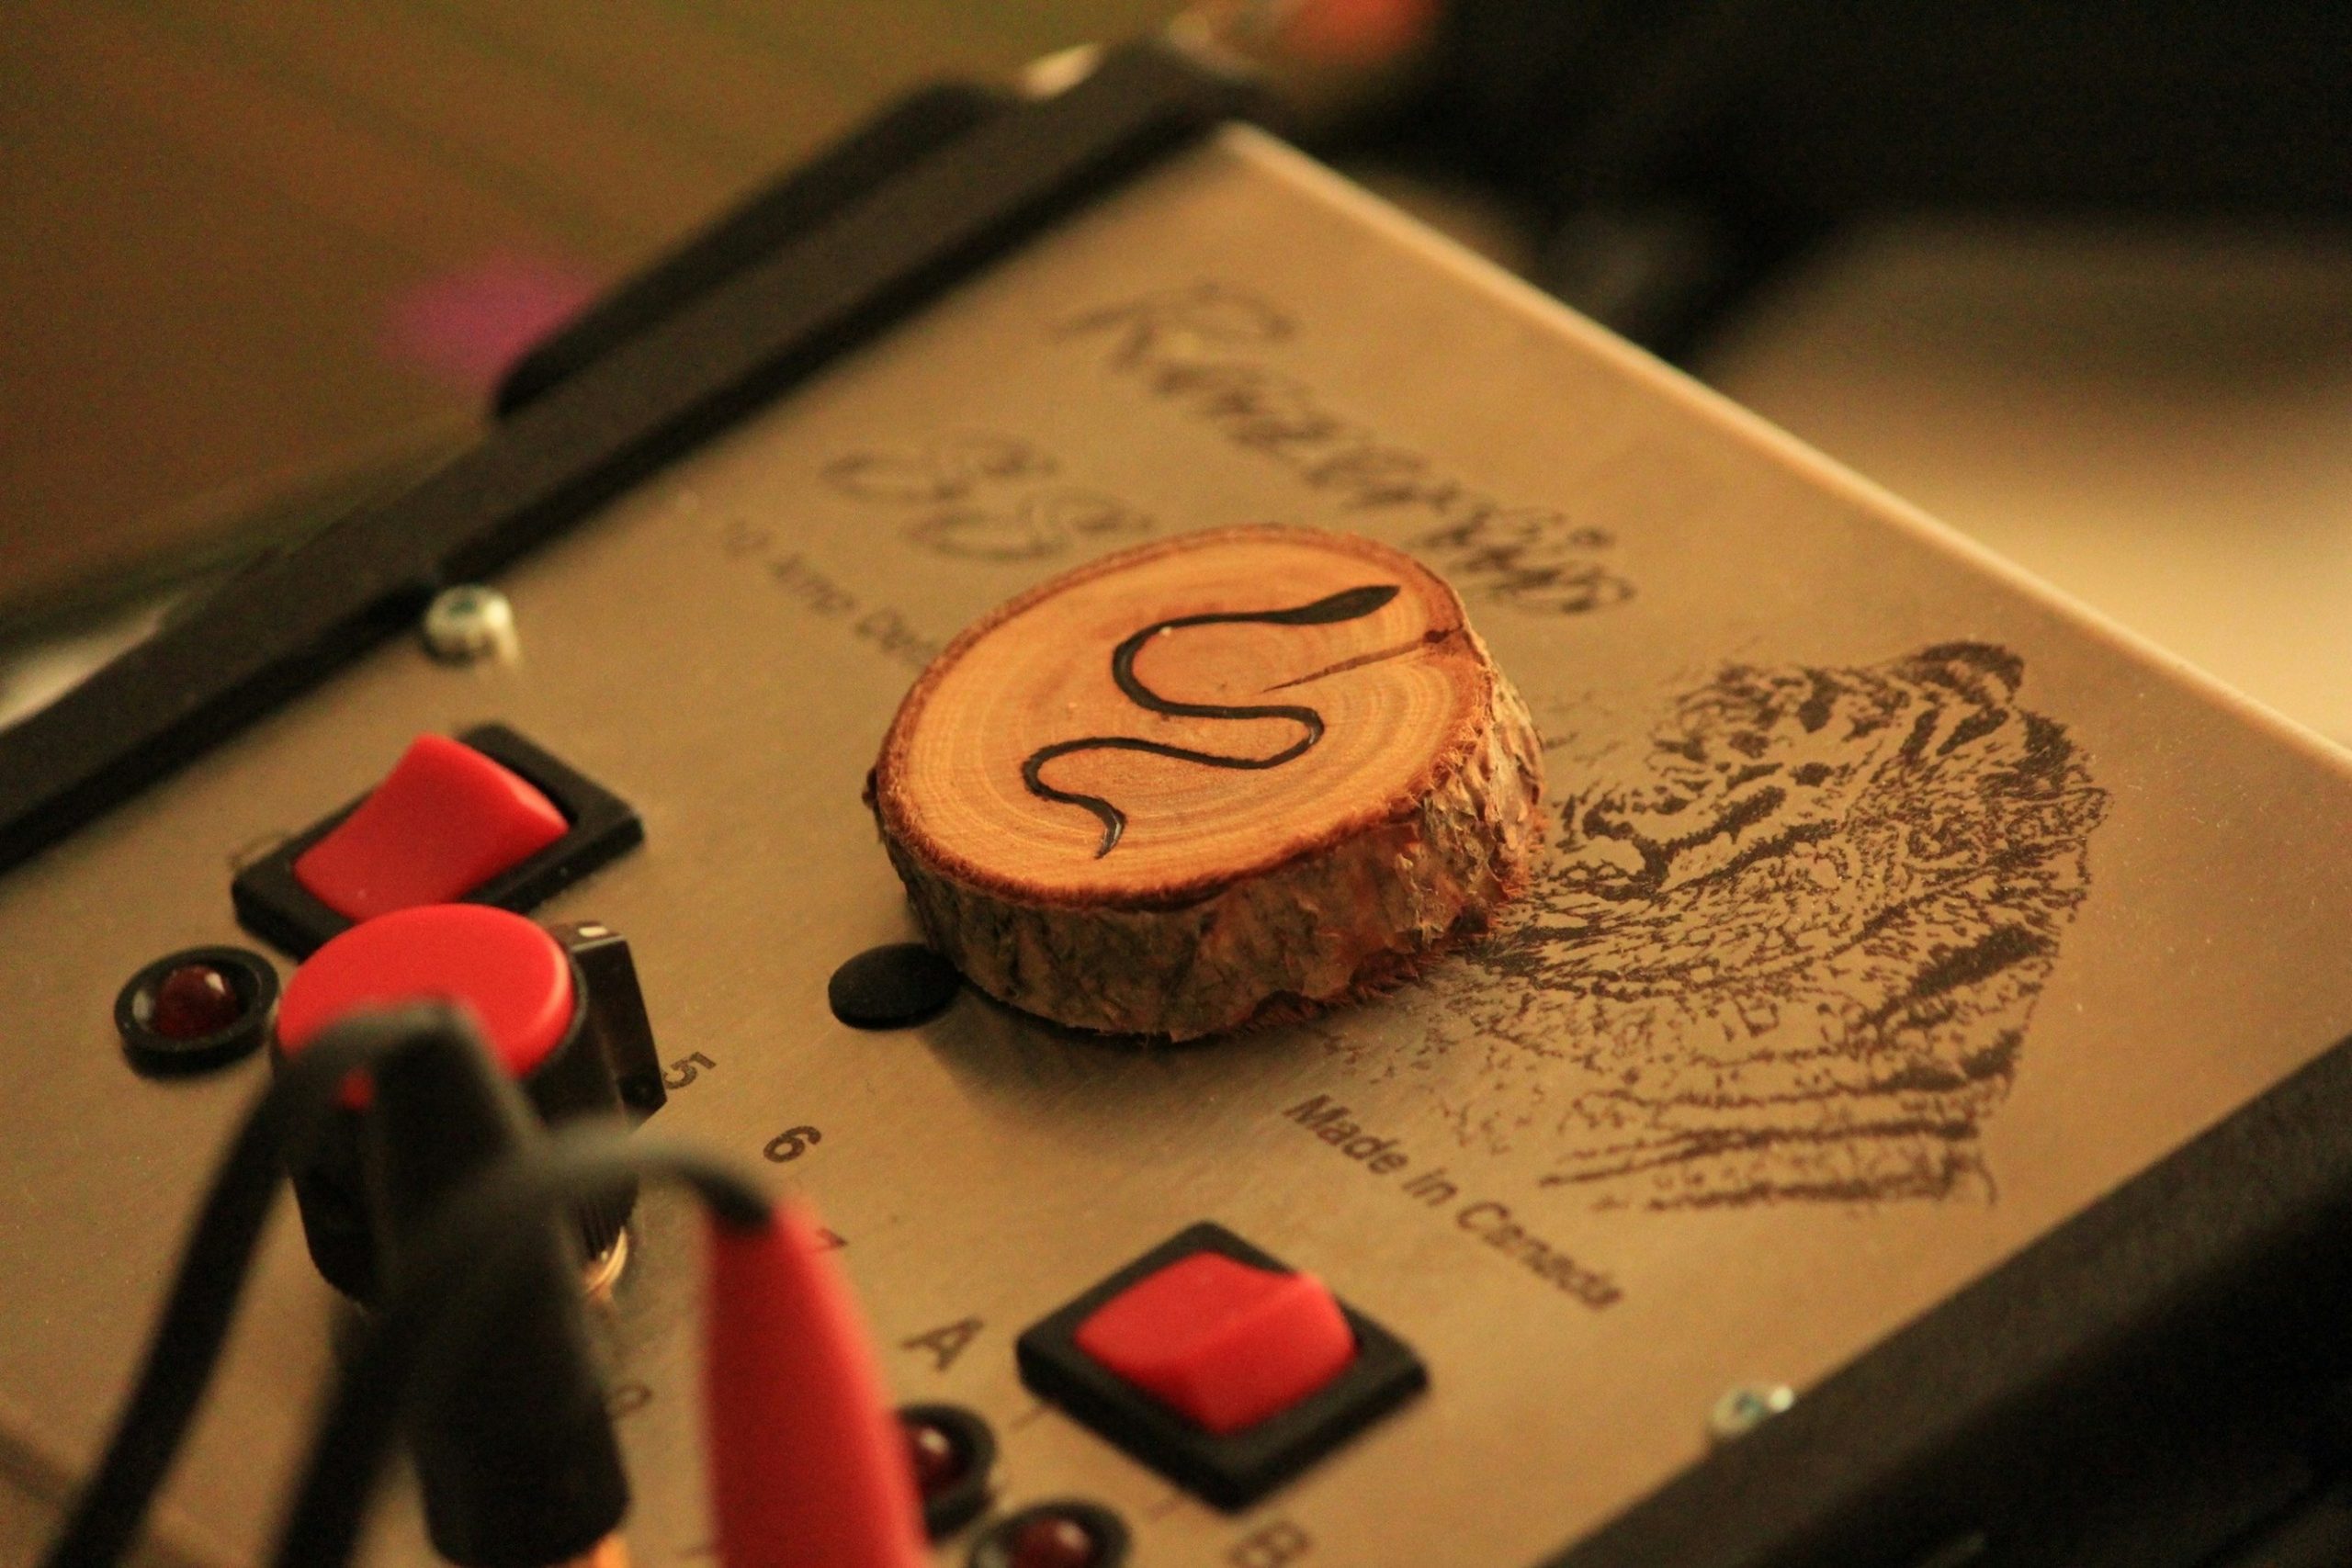
Softwoods are ideal for beginners because they are easier to burn, requiring less heat and effort to create designs. They have a lighter color, which makes your burned designs stand out more.
Examples:
Hardwoods are more durable and offer a refined finish but require higher heat and patience. They’re perfect for advanced projects or items that need to withstand wear and tear.
Examples:
Treated wood, such as pressure-treated or chemically coated wood, should be avoided in pyrography. Burning these can release toxic fumes that are hazardous to your health.
Red Flags to Watch For:
If you’re looking for something with a natural aesthetic, consider using reclaimed or natural wood with bark intact. These pieces can add a rustic charm to your project, though they may require additional sanding and preparation.
Prepare your wood by sanding it thoroughly before starting. A smooth surface ensures cleaner lines and makes it easier to control your tool.
By understanding the properties of different woods, you can choose the perfect material to bring your pyrography ideas to life.
Wood burning tools often come with interchangeable tips, each designed for specific effects and techniques. Understanding the different types of tips and their uses can elevate your wood burning projects and give you greater creative control. Here’s a detailed guide to the most common wood burning tips:
The pointed tip, often referred to as the detail tip, is designed for creating fine lines and intricate details. This tip is ideal for outlining designs, adding precise accents, or working on small-scale projects where accuracy is key. It’s especially useful for beginners who want to practice control and precision before moving on to more complex techniques.
The shading tip is broader and smoother, making it perfect for adding depth and gradients to your artwork. By varying the pressure and heat, you can achieve soft transitions between light and dark areas, bringing your designs to life. This tip is commonly used for filling larger areas, creating shadows, or adding a realistic touch to portraits and landscapes.
The calligraphy tip is shaped to mimic the effects of a traditional calligraphy pen. It’s excellent for creating decorative lettering, curves, and script-style text. With this tip, you can add elegant touches to your projects, such as names, quotes, or flourishes. Practice is key to mastering the smooth, flowing strokes required for consistent results.
Stamping tips come in various shapes and patterns, such as stars, dots, or other decorative motifs. These tips allow you to quickly add repeated patterns or textures to your design without the need for manual precision. They’re great for creating borders, embellishments, or playful designs in a fraction of the time.
The flow tip is a versatile, general-purpose tip suitable for beginners and experienced artists alike. It offers a smooth, consistent burn, making it a go-to for basic designs, outlining, and light shading. It’s a reliable option when you’re experimenting with different techniques or working on a mixed-style piece.
The knife tip is sharp and angled, designed to produce clean cuts and angular lines. It’s often used for geometric patterns, sharp edges, or carving-like effects. While this tip requires a steady hand, it’s highly effective for adding dynamic, bold elements to your work.
Choosing the right tip for your project is crucial for achieving the look you want. By understanding the purpose and technique behind each type, you can elevate your wood burning skills and bring your designs to life with precision and creativity.
If you’re ready to get started with wood burning, having the right tools and materials can make a huge difference. Here are seven highly recommended products to help you create stunning wood-burning projects, each with a mini review to guide your choice.
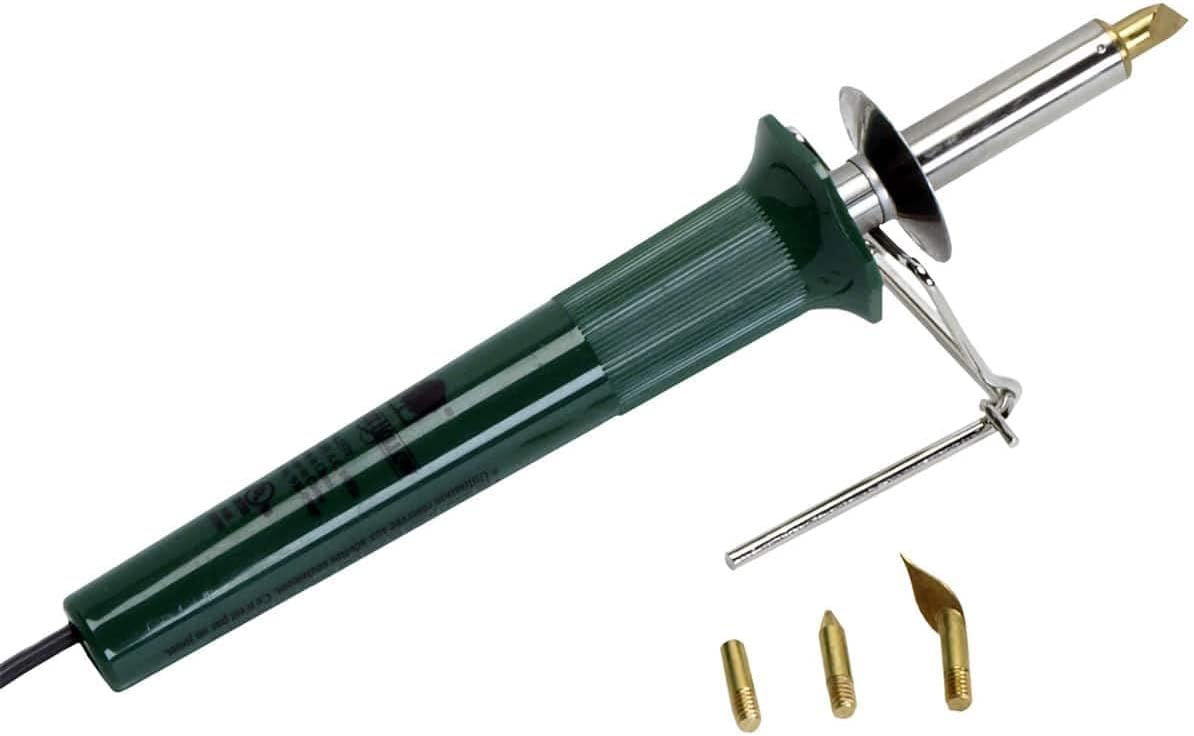
The Walnut Hollow Creative Woodburner is perfect for beginners and intermediate artists. It features variable temperature control, allowing you to adjust the heat for different types of wood and techniques. The kit includes four interchangeable tips for outlining, shading, and detailing. Its lightweight design ensures comfortable use during longer projects. While it’s not as advanced as professional-grade models, it offers excellent performance for its price.
Key Features:
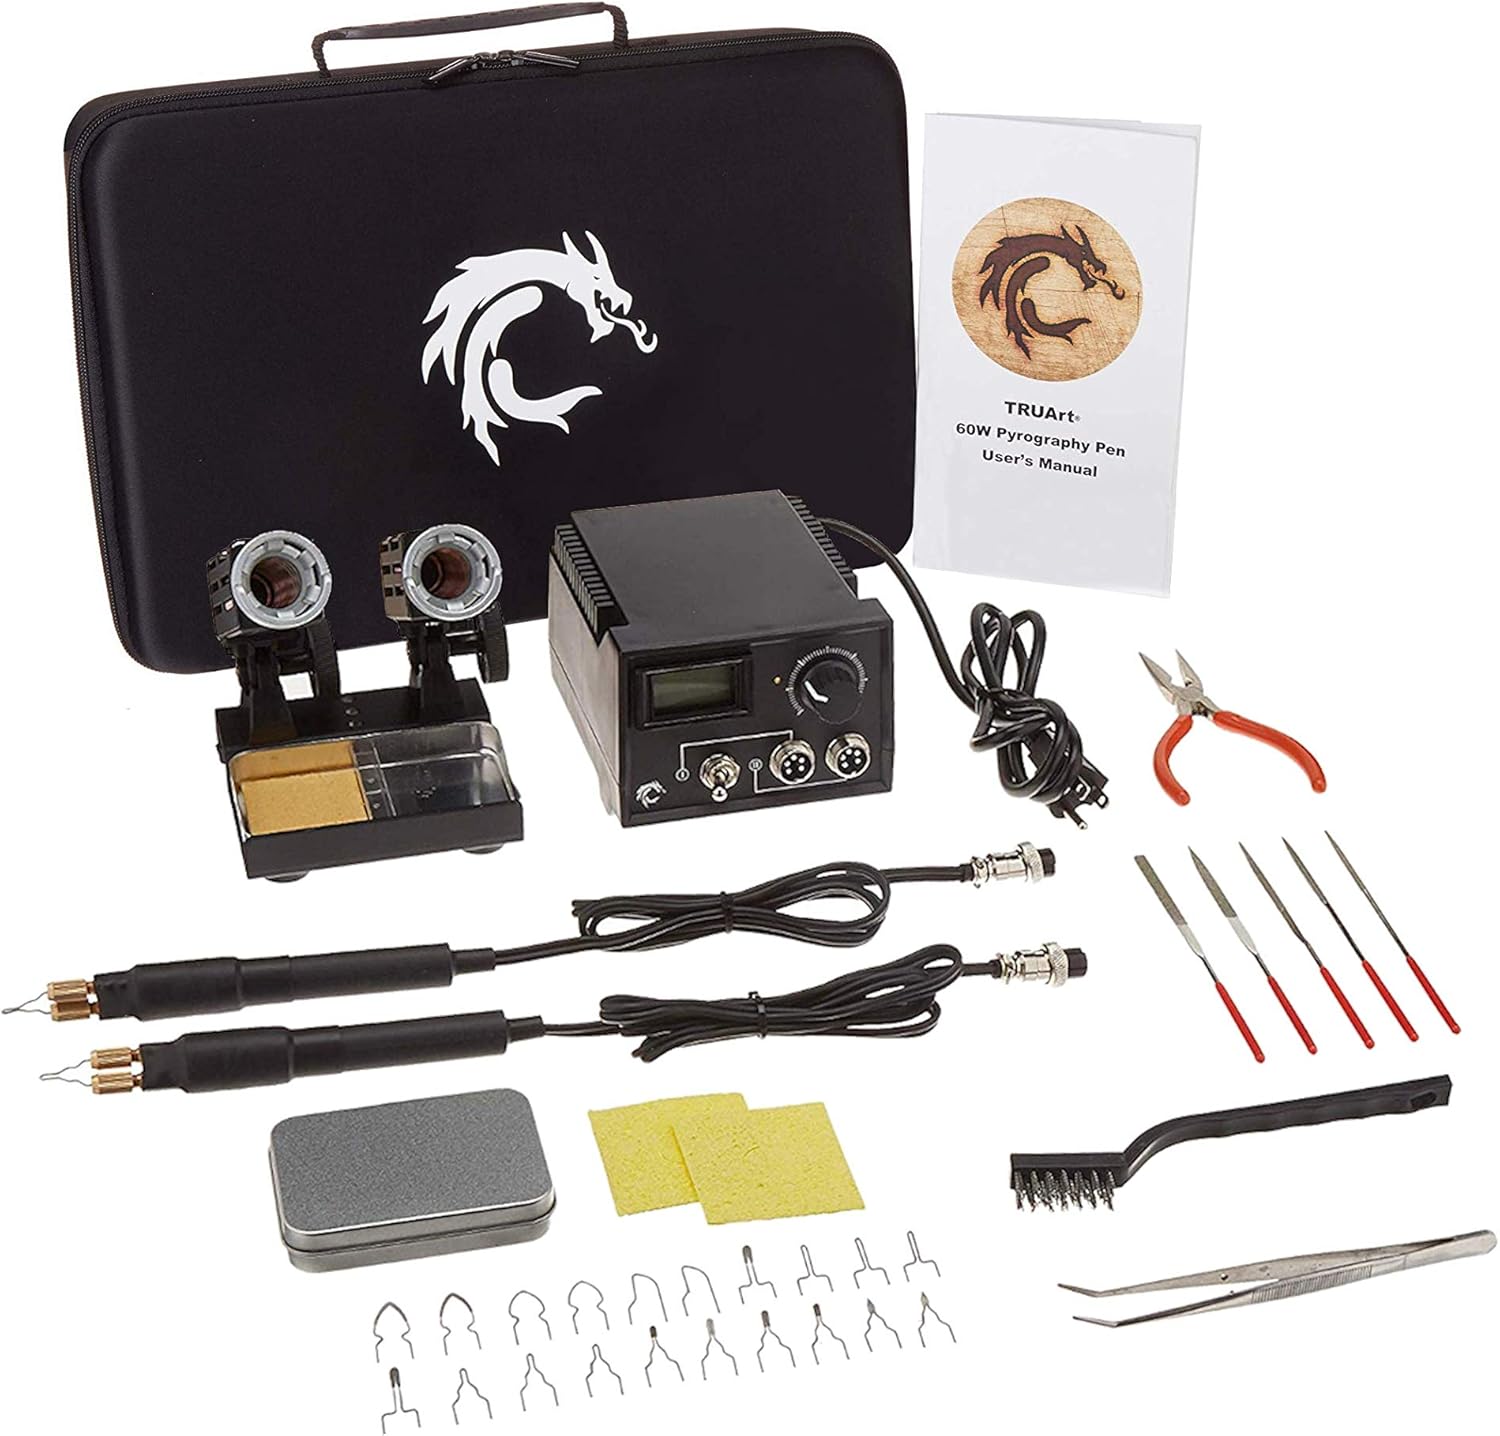
This kit is a favorite among serious wood-burning enthusiasts. It includes two pens and 40 tips, offering unmatched versatility for intricate designs, shading, and patterns. The dual pen design allows you to switch between pens without waiting for the tool to cool down. Its precise temperature control ensures consistent results across a variety of woods.
Key Features:
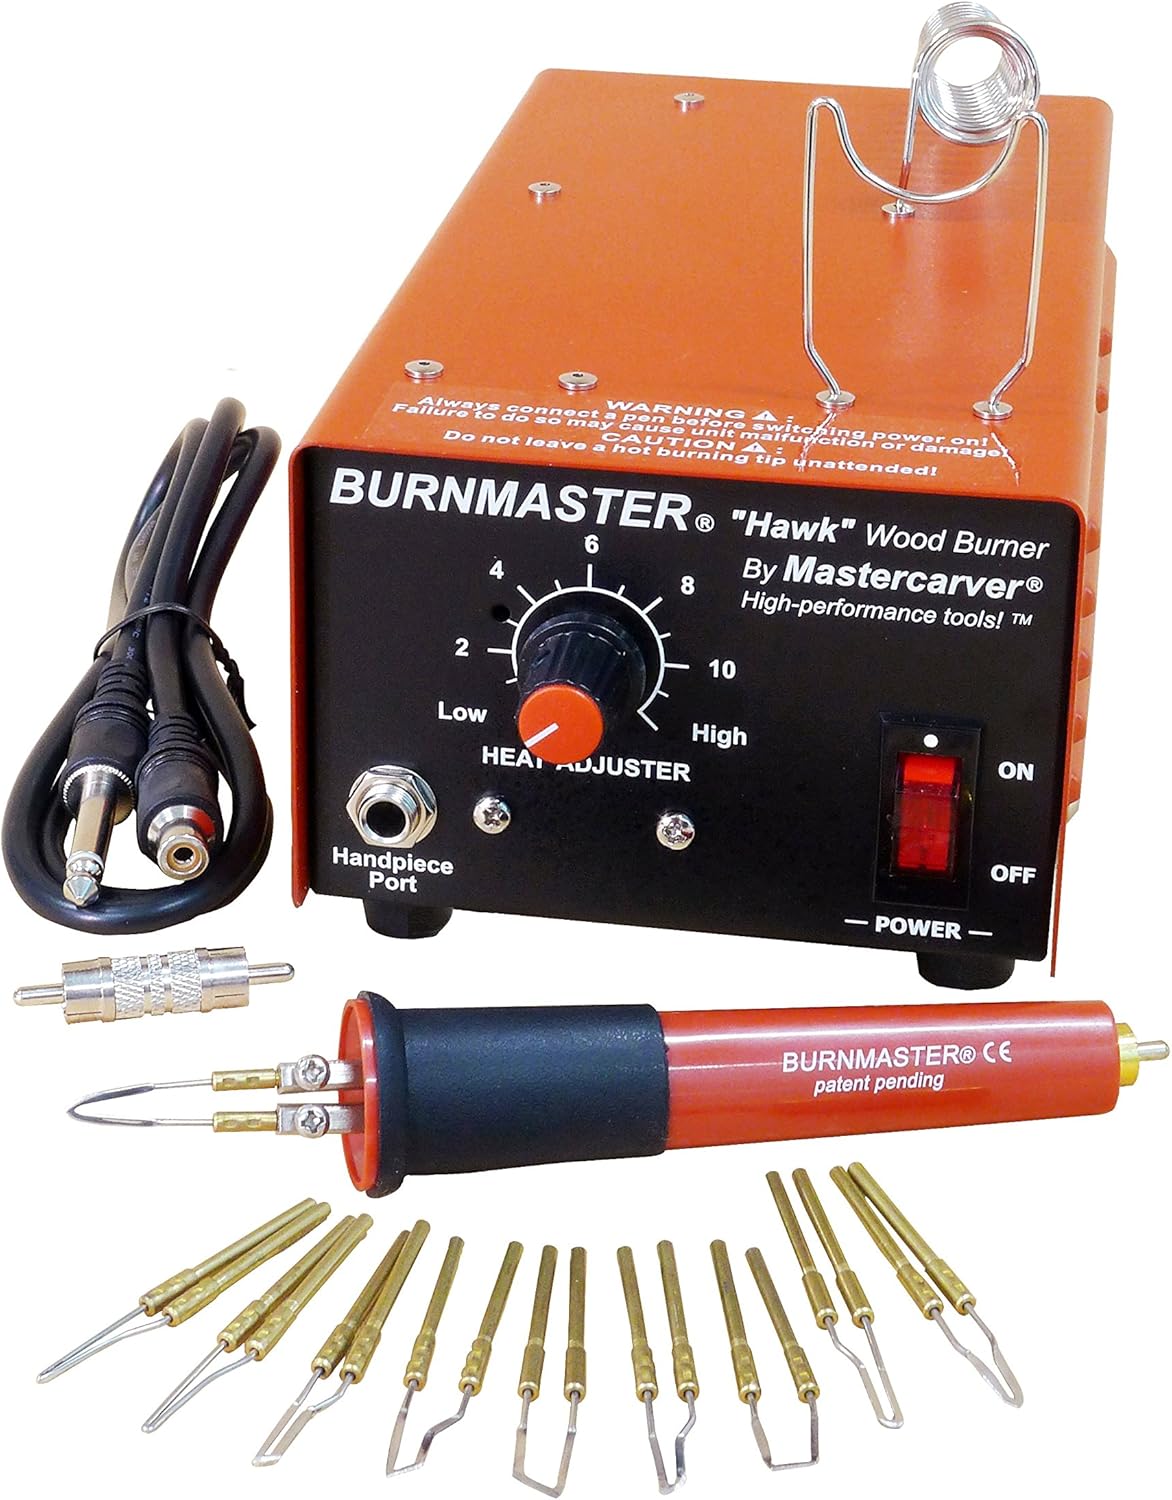
The Burnmaster HAWK is a premium wood-burning tool designed for professionals. It offers advanced features like micro-adjustable temperature control and compatibility with a wide range of tips. The set comes with two pens and 10 tips, making it suitable for large, detailed projects. It’s on the pricier side, but its precision and reliability make it a worthwhile investment.
Best For:
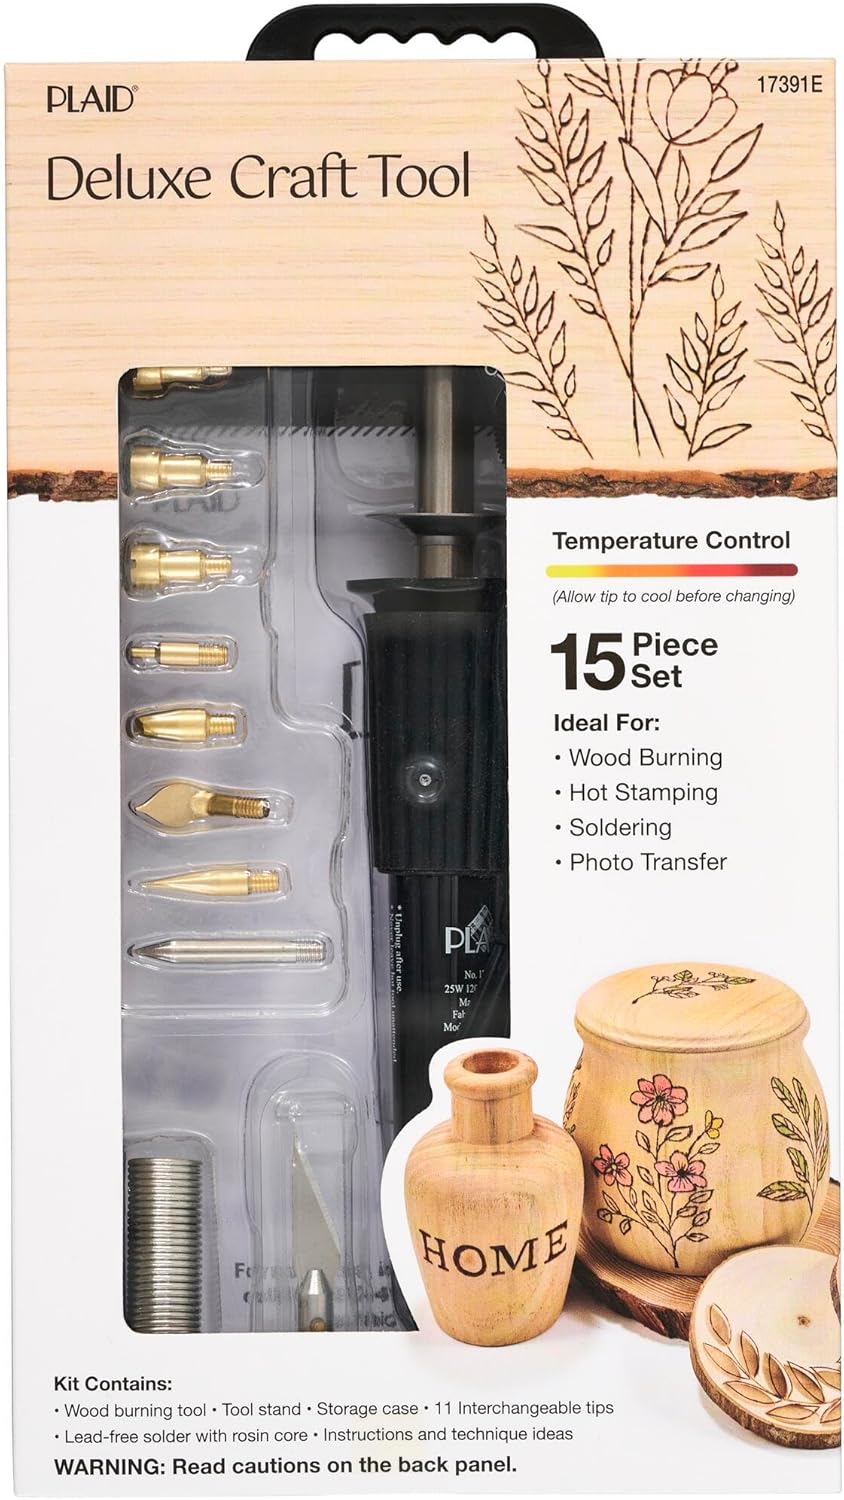
This affordable set is an excellent choice for beginners. It includes a basic wood-burning pen with several tips for general use, such as fine lines, shading, and stamping. While it doesn’t have temperature control, it’s a great starter kit for learning the basics of pyrography without spending much.
Highlights:
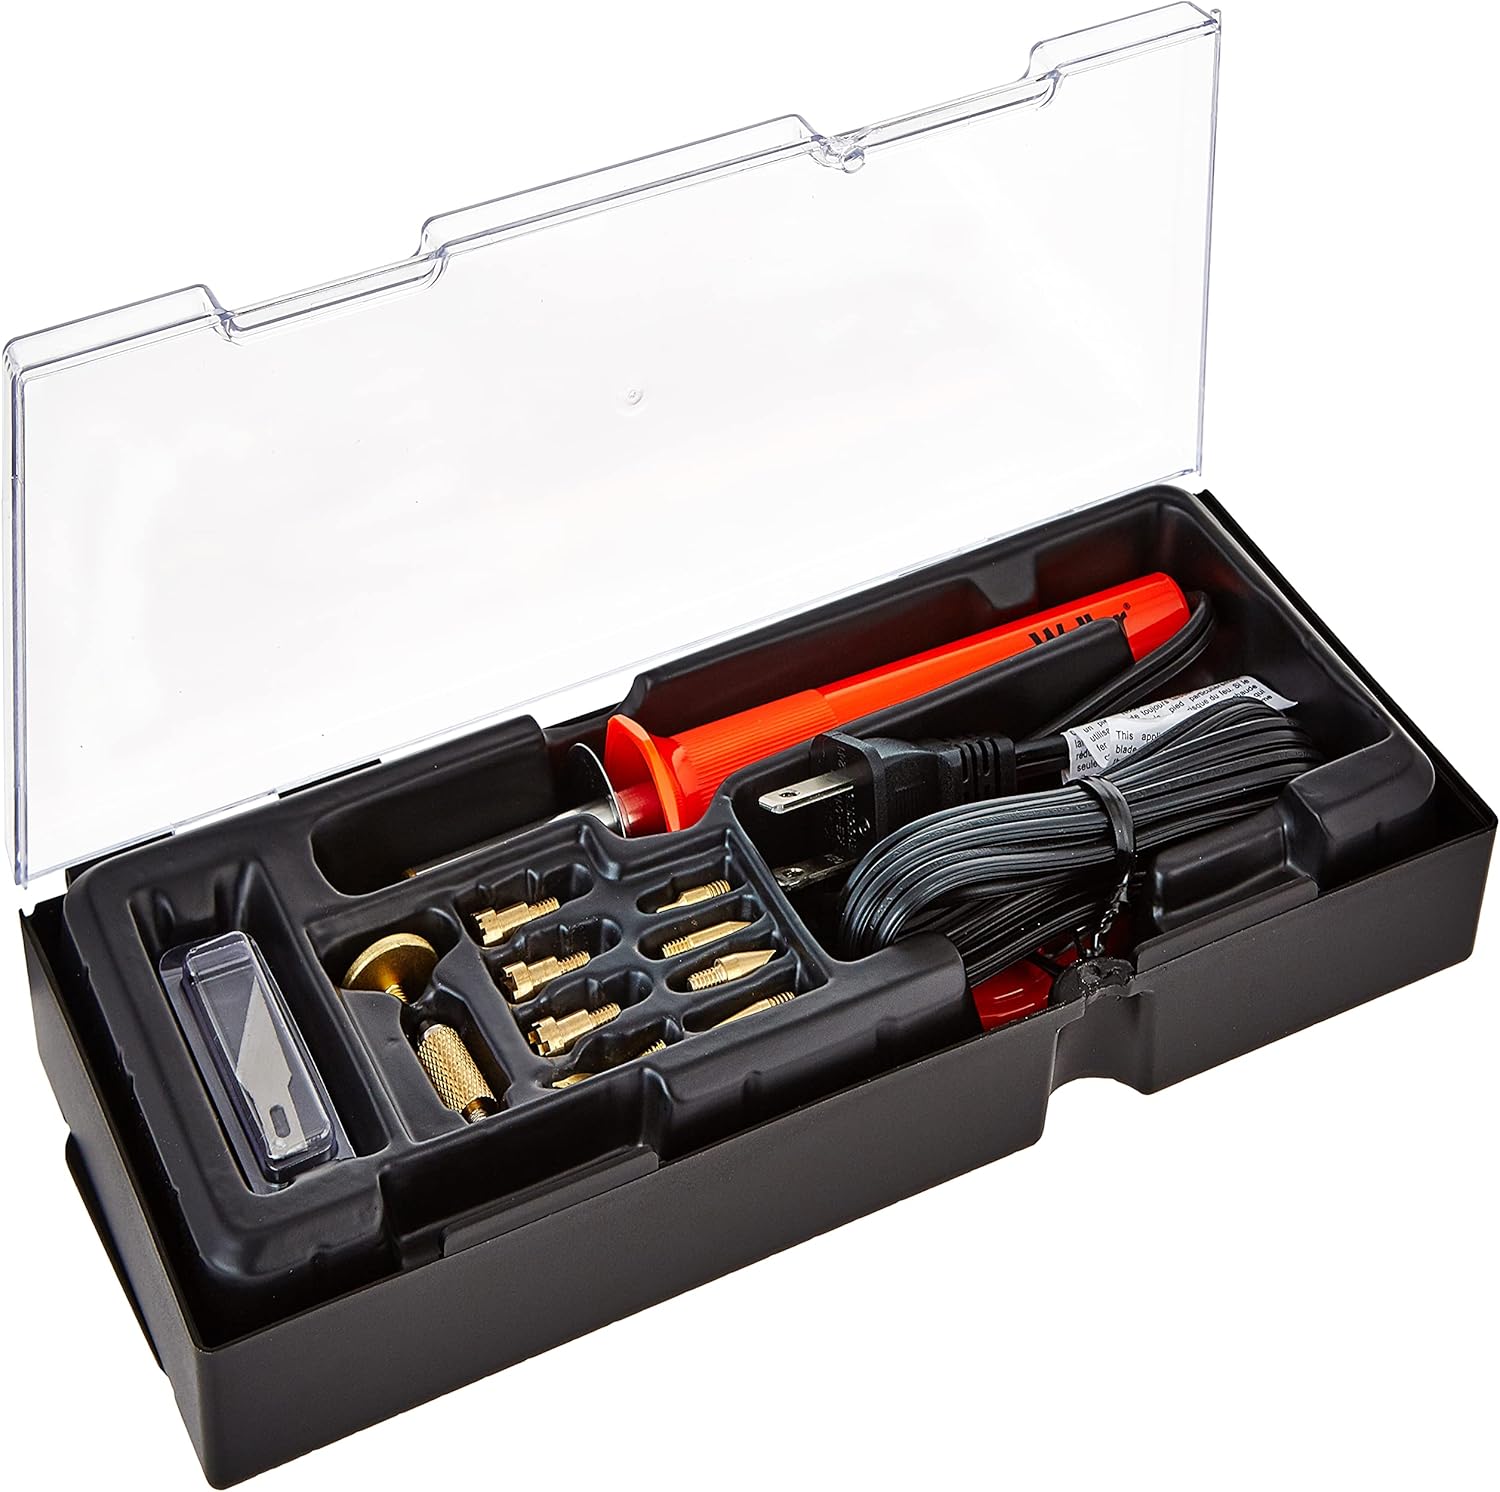
The Weller Short Barrel Kit is a compact and efficient tool for pyrography. Its short barrel design provides better control for detailed work, while the 15 included tips give you plenty of creative options. The consistent heat output makes it reliable for beginners and hobbyists.
Why Choose This:
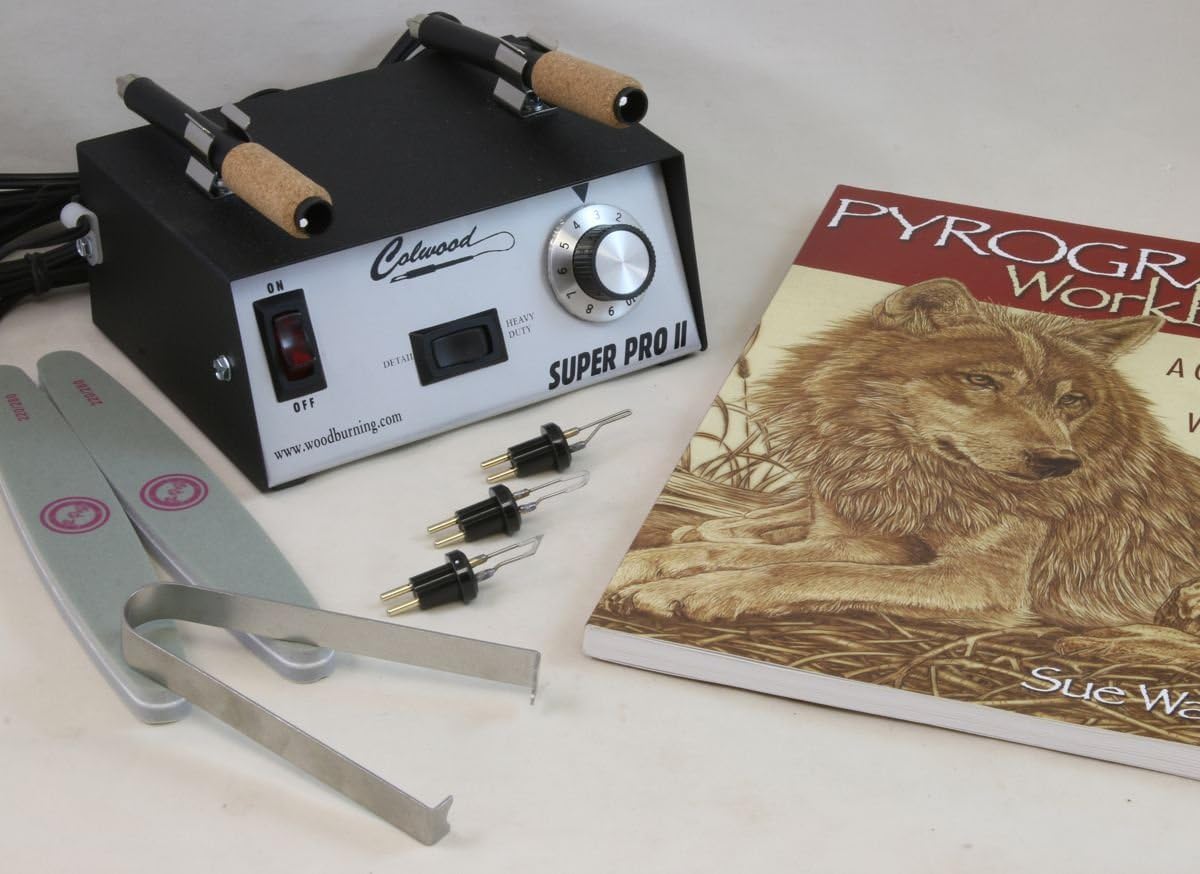
The Colwood Super Pro II is a professional-grade wood burning tool designed for artists seeking precision and versatility. It features a dual pen system with separate heat controls, allowing for seamless switching between pens during intricate projects. The kit includes a selection of high-quality tips suitable for various techniques, from fine detailing to broad shading. Users appreciate its rapid heat response and ergonomic design, which reduce hand fatigue during extended use. While it’s a significant investment, the comprehensive features make it worthwhile for dedicated pyrography artists.
Key Features:
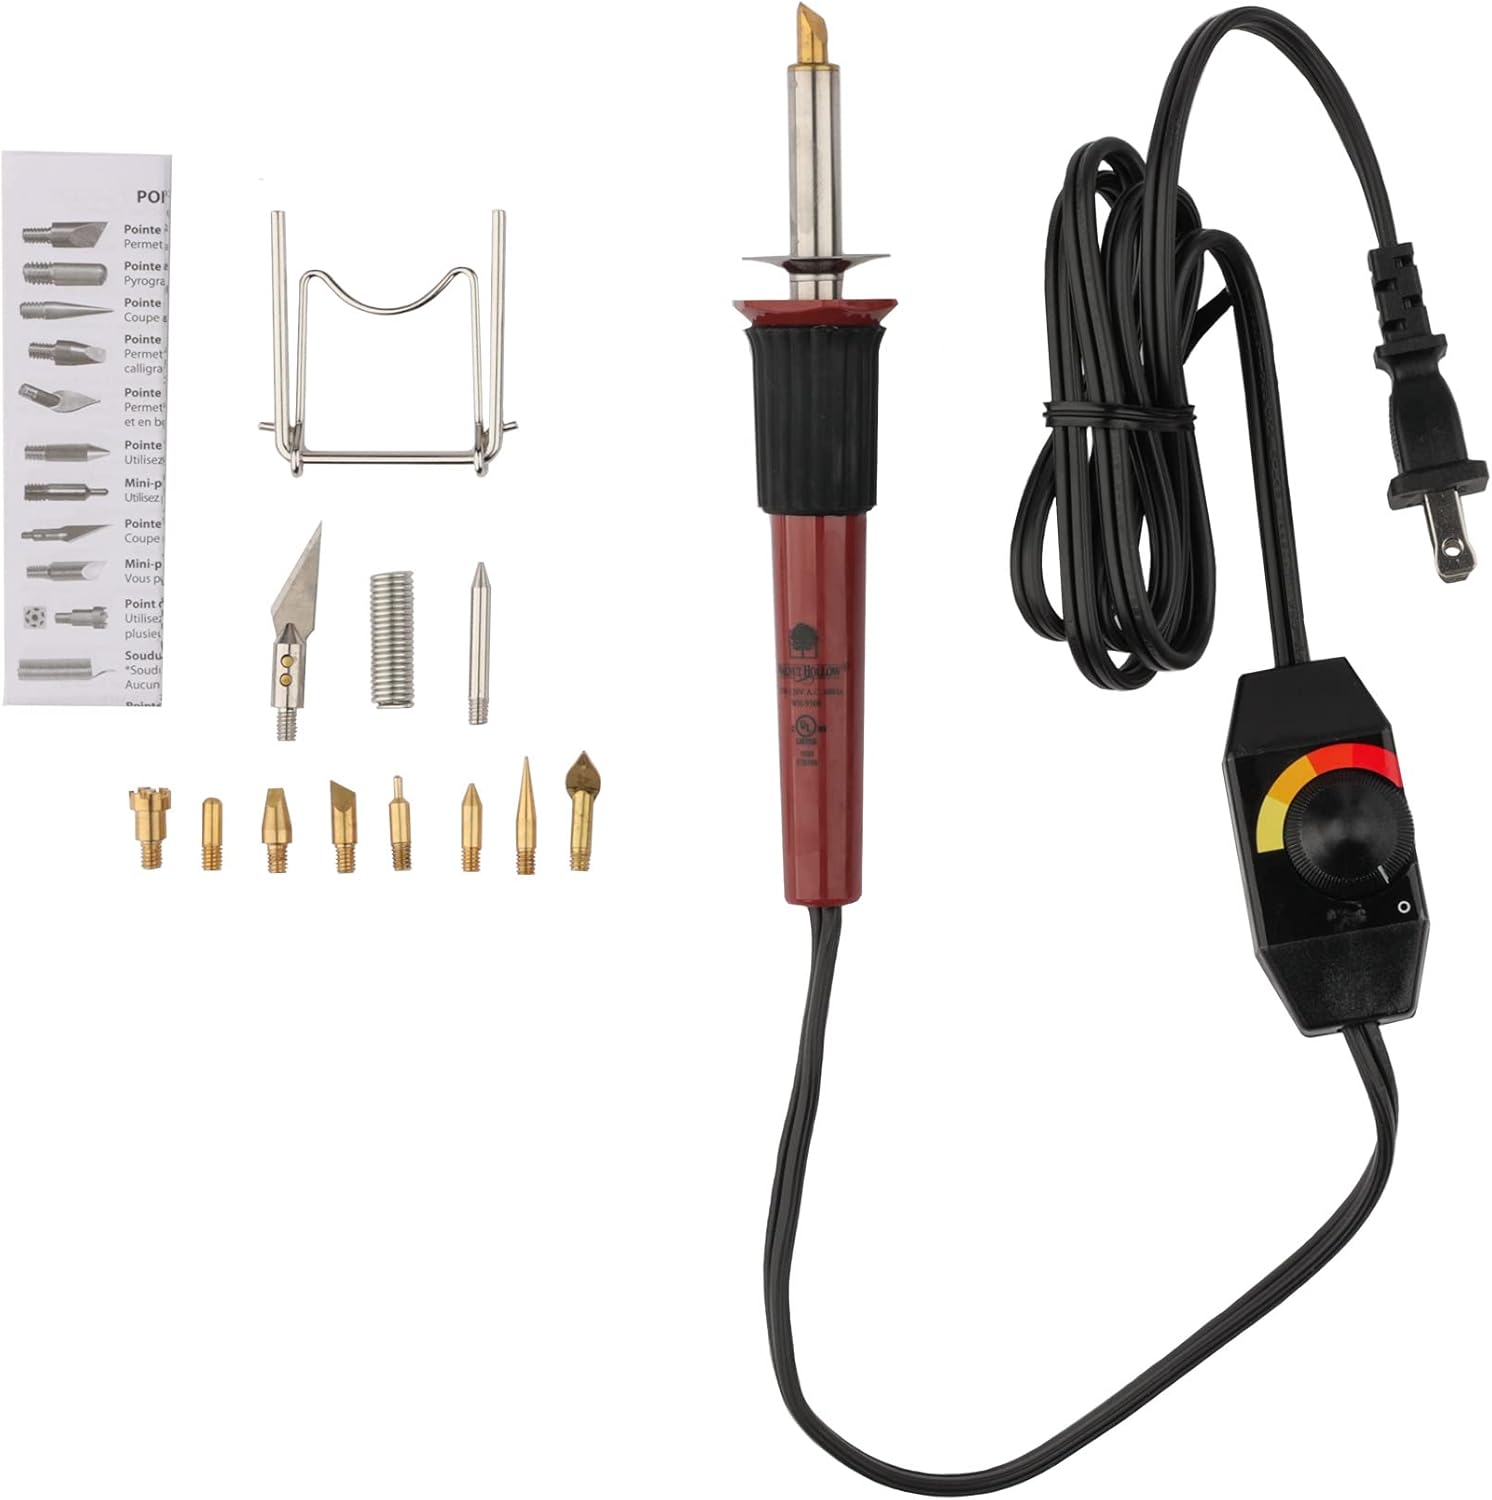
The Walnut Hollow Creative Versa Tool is an excellent choice for beginners exploring the art of pyrography. It features adjustable temperature control, allowing users to work on various materials and achieve different effects. The kit includes multiple tips for diverse techniques, such as shading, detailing, and stamping. Its user-friendly design ensures ease of operation, making it suitable for those new to wood burning. The comprehensive array of tools and accessories provides a solid foundation for anyone looking to delve into pyrography without a substantial financial commitment.
Highlights:
Choosing the right wood burning kit depends on your skill level and project requirements. The Colwood Super Pro II caters to professionals seeking advanced features, while the Walnut Hollow Creative Versa Tool offers beginners a thorough introduction to the art of pyrography.
Wood burning is a rewarding craft, but even experienced artists can make mistakes. Knowing what to avoid can save you time, materials, and frustration. Here’s a guide to some of the most common pitfalls and how to steer clear of them.
One of the most frequent mistakes is applying excessive pressure on the wood burning tool. Many beginners mistakenly believe that pressing harder will create darker lines, but in reality, the heat does the work—not the pressure. Forcing the tip can damage your tool, affect your control, and leave uneven marks.
What to Do Instead: Let the heat of the tool do the work. Focus on consistent movements and adjust the temperature setting for darker burns rather than pressing harder.
Starting your project on unsanded or improperly prepared wood can result in rough lines and uneven burns. Dust, splinters, or bumps can make your tool skip, ruining the design.
How to Avoid: Always sand your wood before starting. Use medium-grit sandpaper (around 120) and finish with fine-grit (220 or higher) for a smooth, clean surface.
Wood burning involves high heat and fumes, and neglecting safety measures can lead to burns, tool damage, or inhaling harmful chemicals.
What to Remember:
Not all woods are suitable for pyrography. Hardwoods can be difficult to burn, while treated or painted woods can produce harmful fumes.
Best Practice: Stick to untreated, soft woods like basswood or pine for clean and easy burns. Test a small area first if you’re unsure about the wood type.
Leaving your tool at a high temperature for too long can cause it to overheat, damaging the tips and affecting its performance. Overheating may also create unintended burn marks on your wood.
Tip: Use temperature-controlled tools to adjust the heat according to your project. Take breaks to allow the tool to cool down if you’re working on a larger design.
Trying to work too quickly often leads to uneven lines, missed details, and sloppy results. Pyrography requires patience and a steady hand.
Solution: Take your time and work in small sections. If you’re working on a complex design, outline it lightly with a pencil beforehand to guide your movements.
Carbon buildup on your tool tips can interfere with the quality of your burns, making them uneven or less precise.
How to Fix This: Regularly clean your tips with a brass wire brush or soft cloth. Clean tips ensure consistent performance and extend the life of your tools.
Many beginners dive into a project without practicing, only to realize mid-way that they’re not familiar with the tools or techniques.
What to Do: Practice on scrap wood first. Experiment with different tips, heat settings, and techniques to understand how your tools work before starting your main piece.
Avoiding these common mistakes can help you achieve better results and enjoy the process of wood burning. Take your time, prepare properly, and focus on safety and technique. With practice, you’ll see your skills improve and your designs become more polished and professional.
Wood burning, or pyrography, is the art of using a heated tool to create designs on wood surfaces. It combines creativity with precision, allowing you to make anything from simple patterns to intricate artwork.
Softwoods like basswood, pine, or birch are great for beginners. They are easy to burn and provide a smooth surface for designs. Avoid treated or painted wood as it can release harmful fumes.
Yes, a wood-burning tool or pyrography pen is essential. Look for a tool with adjustable temperature settings for more control, especially if you plan to work on different wood types or advanced techniques.
Wood burning is safe when proper precautions are taken. Work in a well-ventilated area, avoid burning treated wood, and wear protective gear like gloves and a mask to prevent exposure to fumes or burns.
Yes, you can burn materials like leather and cork, but ensure they are untreated and free of chemicals. Each material may require different heat settings and techniques.
Clean your tips regularly using a brass wire brush or a soft cloth to remove carbon buildup. This helps maintain consistent performance and extends the life of your tools.
Sealing your project with a clear wood finish or varnish is recommended. It protects your design, enhances its appearance, and ensures durability over time.
Absolutely! With the right tools, materials, and some practice, wood burning is an accessible and enjoyable hobby for beginners and experienced artists alike.
| Cookie | Duration | Description |
|---|---|---|
| cookielawinfo-checbox-analytics | 11 months | This cookie is set by GDPR Cookie Consent plugin. The cookie is used to store the user consent for the cookies in the category "Analytics". |
| cookielawinfo-checbox-functional | 11 months | The cookie is set by GDPR cookie consent to record the user consent for the cookies in the category "Functional". |
| cookielawinfo-checbox-others | 11 months | This cookie is set by GDPR Cookie Consent plugin. The cookie is used to store the user consent for the cookies in the category "Other. |
| cookielawinfo-checkbox-necessary | 11 months | This cookie is set by GDPR Cookie Consent plugin. The cookies is used to store the user consent for the cookies in the category "Necessary". |
| cookielawinfo-checkbox-performance | 11 months | This cookie is set by GDPR Cookie Consent plugin. The cookie is used to store the user consent for the cookies in the category "Performance". |
| viewed_cookie_policy | 11 months | The cookie is set by the GDPR Cookie Consent plugin and is used to store whether or not user has consented to the use of cookies. It does not store any personal data. |